
I’ve been dying to write about this for ages, and now that there are fairy-lights everywhere it seems like the perfect time to create some custom-shaped bokeh!
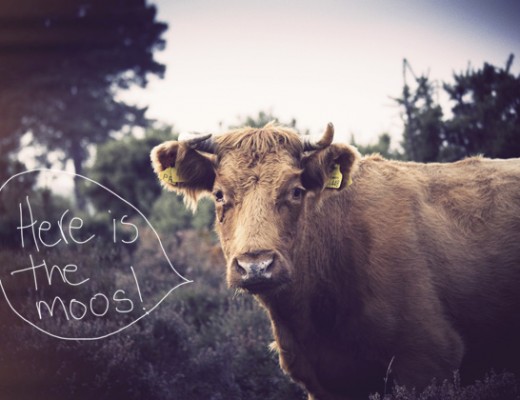
OK, so ‘bokeh’ is one of those unnecessarily nerdy words that photography geeks like to bandy around – although that said, I really can’t think of a more efficient way of describing the roundish-blobs of light that represent out-of-focus points of light in a photograph. You can see it here in the gaps of the branches…

To emphasize the bokeh… (oh, I hate the word bokeh – I’m going to invent a new one. How about blobbiness? Worse? OK, bokeh it is).
Where was I? Ah yes, to emphasize the bokeh you need to throw the background out of focus as much as possible and for that background to be made up of points of light – this means having a very shallow depth of field (you can read more about that in my tutorial here) suffice to say – stick your camera on aperture priority and use the smallest f/number available.
You will need:
- A dSLR camera with your fastest lens
- some black card (not too thick)
- a small craft-knife or fancy stamp-cutter
- sellotape
- something to photograph that has many points of light (AKA fairy lights)
I’m going to use my Canon 50mm f/1.4 lens – this should in theory work with any lens but will be easier to see the effects with a lens that can be stopped-down to a small f/number and therefore will already ‘give good bokeh’.
Make sure the piece of card you have is big enough to cover your lens (but not so big it obscures your vision through the viewfinder). I drew round the lens cap and then cut round little outside the line.
Now the fun bit – choose the shape for your blobbies. A heart is a popular shape and certainly gives an instant lovey-dovey effect to any photo – I though am going to ‘attempt’ a snowflake christmas tree… and maybe a star. Cut this shape into the centre of your card – the overall size of the hole should be about 1-1.5cm across.
If you were so inclined you could fashion a little papery lens cap that popson and off your lens – if you’re impatient like me though just slap it on there with some sellotape, that will work just as well.

Make sure your aperture is opened all the way up (that means the smallest f/number you have available – in my case f/1.4).
Now you can point the camera at your Christmas tree and if it’s out of focus your bokeh will be the shape of whatever you cut out – rather magical, don’t you think?

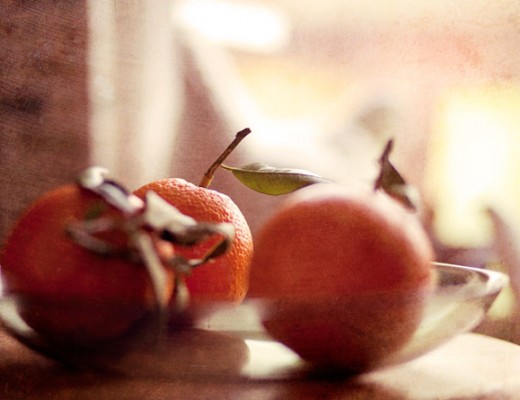
I think it works better if you put something in the main focus rather than putting the bokeh centre-stage.

These aren’t especially wonderful photos but hopefully they are illustrative enough to show just how easy this effect is. Do let me know if you try it!
10 Comments
Rhianne
20 December 2011 at 10:26I’ve often said that this technique alone could make me get a DSLR lol. its so pretty! Perhaps I’ll experiment with my families one over Christmas
Angie
21 December 2011 at 13:05It’s so quick and easy to do… not entirely sure why it works so well, but it does!
Robert
20 December 2011 at 10:51Oh Ms Muldowney, how pleased I am to hear that I’m not alone in my dislike of the word bokeh. It has such an odd effect on me. I like blobiness but I tend to just say blurry light.
I love the tree shaped one you did, most excellent. I WILL give this a go as soon as I’m on holiday.
Angie
21 December 2011 at 13:07It’s the perfect time of year to give it a go – don’t try cutting out a snowflake though – I did and nearly went mad!
Valerie
20 December 2011 at 23:03Thanks for sharing this! (I wander in off Shutter Sisters and enjoyed it.)
Angie
21 December 2011 at 13:07Welcome, Valerie! Pleased you enjoyed it 😀
Betty Thompson
21 December 2011 at 05:04I too am partial to blur or even out of focus.The more I hear the word, the more it stings. Happy to hear the opinion of others. The photo above with the two deer is fantastic.This is a project I must try. Thanks for sharing this hot tip!
Angie
21 December 2011 at 13:08Despite the B-word it’s v easy and lots of fun!
ashleigh
2 January 2012 at 00:43Brilliant!!
Angie
2 January 2012 at 11:47Thanks Ashleigh 😀