Fancy doing some lino printing (sometimes called block printing)? I had a go and it was great fun.
These are things you will definitely need…
- lino board
- lino cutting handle and blades
- paper or card (plus some ‘scrap’ for testing on)
- printing ink (or oil paints and ‘printing medium’)
- ink roller
- kitchen paper
- vegetable oil (or other cleaning medium, depending on what ink you’re using)
- glass or plastic sheet
- rolling pin
- old newspapers
- [nb – I have just discovered there’s such a thing as ‘extra soft lino’ – I’ve not tried it, but it sounds like a lifesaver]
Recommended extra things you’ll need…
- even more kitchen paper
- oven
- bread board
- disposable plastic gloves
- first aid kit
First you need to think of the design you’d like to do – it can ‘negative’ so you carve out a line drawing and the ink fills the background (easier), or it can be ‘positive’, so you carve away all the background and the lines of the image are what print (harder).
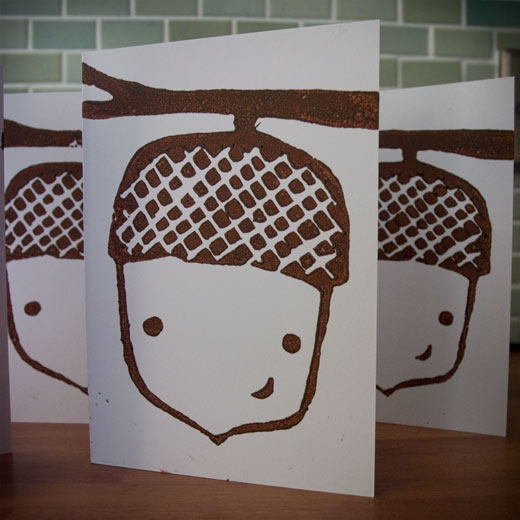
Obviously I chose to dive right in with the harder approach and began to carve away at the background with a big blade. OH MY GOD it’s hard work, and so hard to control! A little googling later I found out that this process becames about seven hundred times easier if you warm the lino board in a low oven for a couple of mins first (and you’ll need to keep doing this through the process – oh and don’t use the microwave!). Phew, that’s better. It’s still quite tricky though, so be patient with it, especially with the curves and any fine detail. Oh, and don’t forget, you are carving a mirror image of what will actually print – very important if your design includes any lettering!!
Oh, and depending on how fond you are of having a full compliment of fingers and thumbs, carve AWAY from you. Probably best to rest on a bread board or such like too.
Depending on how deep you carve will depend on whether you get those little carving lines showing in the background when you print – sometimes this can be a good thing and adds to the look of the design. Otherwise, dig deeper!
Eventually you’ll be happy with your work (or impatient to get the printing started), so now it’s time to set up for the messy stuff!
A kitchen worktop is ideal for this, covered in lots of old newspaper. Get a sheet of glass or plastic – something that’s very smooth and non-absorbant and that you don’t want to use for food preparation ever again.
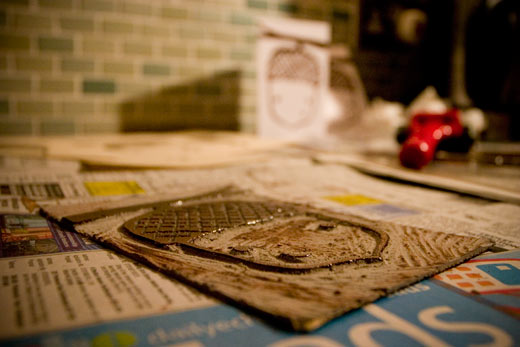
Squirt your printing ink (in my case one part oil paint to one and a half parts of ‘printing medium’). Blend if necessary and spead around with a palette knife. Now, get your roller, roll it slowly to cover with a layer of ink, then speed up so you’re going back and forth with it quite quickly (and at different angles too) this will give you a thin and even coating, which is great!
Roll your ink onto your lino, making sure all the raised areas are covered (especially round the edges). Now take some paper or card (you’ll want to do some test ones first) and lay it carefully in place. I used a rolling pin to roll over the paper – you’ll need to do this really quite firmly and in different directions. If you want to get professional about this, you can invest in the proper tool for this, which is called a baren.
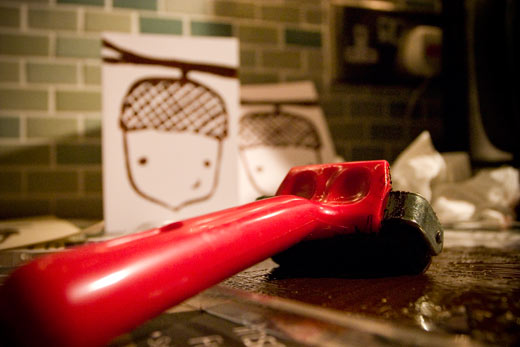
Peel the paper away from a corner (have a peep before you peel it all away – at this stage you can always lay it back down and have another roll). Ta da! You have made your first print! You will need to ink the roller and lino for every print you do, but you’ll soon get the knack and be knocking them out at quite a rate after the first couple.
Cleaning up is a pain in the arse and the worst bit of this whole process. If you didn’t wear gloves up until this point, you’ll want to put some on now – ideally disposable ones. Kitchen paper is the best thing for this job, along with a cleaning solvent (in the case of oil paint and printing medium you can use vegetable oil).
It’s worth spending time cleaning your lino carefully as you’ll be able to use this again and again.
Depending on the thickness and type of ink you’ve used you’ll need to allow at least 12 hours for drying – possibly more than this.
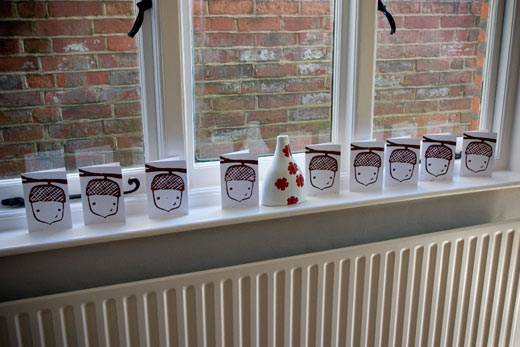
If you have a go at this I’d love to see your finished results!



51 Comments
island sweet
19 February 2008 at 11:33lovely post and very well described. i teach lino printing to my 3rd year stage craft students (as a simple way to teach them about printmaking) and their results are always satisfying. discovered your blog on etsy. love the name!
High Desert Diva
19 February 2008 at 14:57I admire your tenacity.
Don’t think I’d have the patience for this. I’ll just oogle the work of others.
I like the way your cards look lined up on the sill
The Pairabirds
19 February 2008 at 18:43Excellent! I just bought a stack of lino blocks this weekend. I haven’t made any block prints since high school and was looking for some good tips. Your post = perfect timing.
Good job:)
Angie
19 February 2008 at 19:14I have to agree with the mess – mind you, I’m also someone prone to make a mess…maybe we’re just special lol.
Great blog article though! thanks so much for sharing it with my in the forums!
~Angie
Pamelajean
19 February 2008 at 23:04Great tutorial. I never knew what lino printing was. May give it a try one day. Nice blog. I am going to try to set up a blog of my own this week. I’m on Etsy and need to expand my horizons.
cath
21 February 2008 at 15:55I have wanted to try this for so long but all on line instructions seem too complicated. Yours is perfect and makes me think I can try it now. It will probably still take me months to actually getting around to doing it though!!
Amanda
22 February 2008 at 07:31You know, I see several of the illustration students bring in lino prints and I always wondered how it worked! Thanks for the tutorial and I adore your print it is so cute and quirky! Well Done!
mgu
11 September 2008 at 21:29I am so having a go at this, possibly forward it from my blog too!
Emma
17 October 2008 at 07:06I’m studding GCSE art and we were doing this with our shell drawing/paintings we have been doing. I found it quite fun doing it but i got a bit fed up with shells so i would like to do it again but with somthing different.
Emiley
22 October 2008 at 18:23This is a great tutorial, however I’m using lino printing in my GCSE Art, and I find it a lot faster and easier to heat the lino using a hairdryer. That also saves trips to the kitchen!
F R
17 December 2008 at 12:48I managed to avoid the mess by using water based inks – I got good quality ones and they gave almost as a good a result as oils – just means you can use water, you don’t get ink everywhere!
F R
17 December 2008 at 12:49Also, I just pop my lino on the radiator and let it soften for a bit, also do this to dry and just before printing as gives a more even cover!
valentine
3 January 2009 at 12:50Hey!!!! Thank you! Thank you! Thank you! I am a first yr art n design student, and we have a unit on printing techniques that I just cannot seem to understand!!! We were asked to do lino prints and I just couldn’t get how the carving produced the results we were shown to emulate!!! But u’ve explained it so well, I’m gna get ryt into it durin the next class- on Tuesday- and @least I now know how to go about it!!!! Thanks agen for the easy 123.
Emelia Purcell
15 January 2009 at 17:28You Rock oops You Print!
Very very hands on thanks I am going to follow your example
nisha
27 January 2009 at 14:50it is a beautiful picture i love it
Hillbilly Goat Girl
13 February 2009 at 17:37I would enjoy more info on the actual usage of the tools. It must be so simple that none is needed? There must be some tricks to controlling for different lines and spaces.
More info welcome!
sara
27 March 2009 at 21:59It was fantastic.Gave me ideas.
sara
27 March 2009 at 22:02I tried it and guess what it made me bleed all because of u, stupid thing. I think you should add health and safety issues CAUSED, anyway thanks it was useful.
geena
22 April 2009 at 17:40thank youi have used some of you information for my art home work
Philippa
25 May 2009 at 09:20Thankyou this has helped me with my Art homework =]
Jasper
16 June 2009 at 02:01Great tips. Thanks for the help. Looking forward to putting it all together.
Stephen Yeomans
1 July 2009 at 16:54Here at Educational Art & Craft Supplies we have developed new “Softcut” lino which is much easier to work with than traditional linoleum which is ideal for beginners! We also have a wide range of lino, lino tools, safety cutters, rollers, hand guards, water-based printing ink, and printing kits available. If you want to give Lino Printing a try then why not use this coupon for 10% off anything on our site in July: “Lemon1” at http://www.educational-art.co.uk
Jill
2 July 2009 at 16:07This is great! I have just taken up printing and would love to put a link to this page on my blog! If that’s cool!
Liz Ellard
7 July 2009 at 18:42Always cut away from yourself ==== golden rule if you’d prefer to keep hands intact !Turn the lino to make sure that you cut away === easy and much safer once you get used to working this way . Excellent blog by the way ( a linoprinting fan )
Dom
22 September 2009 at 20:58In GCSE Art i made a cool one lol
We were doing war
Will post a pic at some time
Rebecca
4 November 2009 at 20:15I’ve been doing printing for GCSE art and you explain it much nicer than my teacher (:
I like your design, its cute x
Jeb
9 December 2009 at 14:00I’m almost in the printing stages of a jackrabbit that I carved for my son-to-be mother-in-law (Christmas present). I’m glad I found your blog; it’s a total help! Good work.
Kathy
12 January 2010 at 10:27I am going to have a go at lino printing and came across your website – brilliant. I am interested in using oil paints (I have loads) and “printing medium” – can you explain what, how etc.?
Thanks
amanda@nakedartists.com
21 January 2010 at 17:57Brilliant thank you. Very clear instruction.
I didn’t know how I could work with the hard lino. Thanks for the tips.
Di Walsh
29 January 2010 at 06:48Thanks. I have been having trouble getting a solid black print and have been searching for some clearly written instructions for lino printing. Yours is great.I will stop searching now and try your way.
bethany pearson
3 February 2010 at 17:23dont cut yourself it really hurts badly it bleeds like mad trust me ive done in art
Frank A. Finley, Salishsilver
10 February 2010 at 05:25Here are some of my first lino print run. http://www.facebook.com/album.php?aid=2026546&id=1296182941&l=9a0822c6c3
gail
13 February 2010 at 05:53Nice. Im about to begin my printing experience and wanted to do a bit of googling first.Thanx for the info.
Therese
15 February 2010 at 21:03Like the site. I have just returned to the art scene after many years away. I started with etching and am now exploring lino printing. You can use one lino, print a basic picture in a light colour then take off some more lino, print on top of the last print ( making sure you marked the paper underneath to line it up) and so on. Really exciting stuff as you reveal each print. Make sure you do six to start with just in case you dont line them up exactly. probably end up with one or two good prints.
Marissa
29 April 2010 at 03:31Thanks for doing this blog, instead of going to my class today (which was a lino print demo) i googled and found you instead lol. I think your blog has given me all the info i need Keep up the good work, i like your little nut character image. PS what is with the couple of random negative comments- losers!
Grant Philpott
1 May 2010 at 23:21I would add that if ypu have a LAZY SUSAN (what they use in the middle of Chinese restaurant tables) this helps when it comes to carving and turning the lino to get the correct angles.
Michael Dean
10 May 2010 at 22:14I especially like the alternative to buying block print ink. I live in a small town in Mexico and ink isn’t available. I wonder if there are any other ways to “modify” more commonly available materials (such as oil paint) to print with.
By the way, I live in an area where they make shoes and I use a rubber product used to make soles instead of linoleum. It is soft and cuts like a dream. Ink adheres to it much better than linoleum.
emma
12 May 2010 at 19:16good job!! this is a great blog:)
Breanna Worley
21 June 2010 at 06:23what would the first stage of lino printing be?
Pisa
14 November 2010 at 14:22you can put a hot iron on the lino and it makes it a lot easier and is a lot quicker than putting it in the oven.
student2
17 November 2010 at 16:36hello im just searching for research how to safety use lino prininting thanks guys and girls
elderlymusemum
28 November 2010 at 15:57softcut is brilliant – I’ve just made two prints for Christmas cards. BUT, I’ve had major problems with getting the ink onto the linocut. As soon as I spread it out it dries and at about 50p of ink for each card it’s too expensive:( I have been using waterbased block printing ink – is the oil paint and printing medium better for staying ‘wet’ a little longer??
Angie
7 December 2010 at 00:58Hi elderlymusemum (I tried to email you a response but your address was invalid – hopefully you’ll see this)…
i’ve only ever used the oil paint and printing medium method (as opposed to water-based inks) – i never noticed any drying out so it probably would be a better solution for you – the only downside you might find is them taking AGES to dry (but I guess you can’t have it both ways)
Angelo Lotte
20 January 2011 at 03:44really amazing that this works. Now I got it completely,
Susan Bonaci
22 February 2011 at 05:01Thanks for the tutorial. I’ve just finished cutting my first lino and was looking on the internet for advice on printing methods. I did a test print with acrylic paint but it didn’t adhere to the silk lino like I hoped. I seem to remember using a tacky black paint when I was in high school. I might try oil paint and medium.
Printed Flyer
11 March 2011 at 08:24I usually print flyers, but have never done Lino Printing before. Looks interesting so I will definitely have a go with that. Thanks!
Susan Durack
23 March 2011 at 13:47Thank you for a great tutorial. Only beginning myself.
Really taken with the font you have used on your weblog heading
can you let me know what it is?
Naomi S L Hanna
5 April 2011 at 11:53love it, great blog!!
Grant Philpott
13 April 2011 at 22:30If you were making a limited edition print would you do the following:
a) sign your name? And if so in pencil or pen?
b) would you use an embossing stamp?
b) limit the edition to the number of successful prints or round up to the next 10?
c) charge a small amount to sell a print or keep the price competitive?
e) offer the choice to buy the print framed or unframed?
I’ve just done two weeks of printing to produce a set of 5 lino prints and don’t want to undercut myself nor give them away! Any advice
cheers
Grant
Grant Philpott
13 April 2011 at 22:31or words to that effect. (I have been working with alot of oil based ink!)
printing
26 October 2011 at 09:17Thank you for putting this together… You’re very talented and those are some great tips. I think it’s great that you want to help people with the knowledge that you have gained. I am an aspiring photographer.. currently it is a hobby, but I’m on my way to school for it. I’m very excited! I’ve been working on my skill for the past couple of years, and have realised that I am very passionate about it!